Halloween Peanut Butter Blossoms
These Halloween Peanut Butter Blossom cookies are the sweetest way to add spooky fun to a classic cookie! Made completely from-scratch, they’re soft, peanut buttery, and topped with that classic chocolate kiss—only this time with a spooky twist! Simple to make, totally unique, and guaranteed to disappear fast—making them one of the best Halloween treat ideas to bake. Whether you need spooky cookies for a party or just want some easy Halloween desserts to share, these are always a hit!

A SPOOKY SPIN ON A CLASSIC
Peanut butter blossoms are already a cookie jar favorite—soft, chewy, and topped with a chocolate kiss. But for Halloween, we’re giving them a little spooky twist! Instead of the classic plain chocolate kiss, you can swap in Halloween-themed candies, or get creative and make your own Halloween chocolates using melting wafers and silicone molds—exactly what we’re doing in this recipe.

WHAT YOU’LL NEED FOR THESE HALLOWEEN PB BLOSSOM COOKIES
These soft, chewy Halloween Peanut Butter Blossoms use mostly classic pantry staples—with peanut butter and Halloween chocolates for a spooky twist. One of the easiest Halloween desserts to make from scratch, and a fun Halloween treat idea for parties or family baking!
- Butter: Butter adds rich flavor and helps create soft, chewy cookies.
- Granulated Sugar: Sugar doesn’t just sweeten things up – it’s also key for structure. It helps the cookie dough spread, as well as set with distinct edges after cooling.
- Brown Sugar: Brown sugar adds moisture and chewiness to cookies thanks to the molasses in it.
- Peanut Butter: A must-have in peanut butter blossoms, bringing that signature nutty flavor and chewy texture that makes these cookies a crowd favorite.
- Egg + Egg Yolk: The egg provides structure and moisture, while the extra yolk adds richness.
- Vanilla Extract + Salt: Both add flavor and help enhance other flavors.
- All-Purpose Flour: Flour provides the main structure for these cookies – these can also be made gluten-free by switching 1:1 with gluten-free flour.
- Corn Starch: Prevents the dough from spreading and keeps the cookies nice and chewy.
- Baking Soda: Baking soda helps cookies spread and brown.
- Baking Powder: Baking powder helps with lift and thickness.
- Halloween Themed Chocolates: Add a fun, spooky twist without any extra work!
- Milk Chocolate Melting Wafers: Easy to melt and mold into festive shapes.
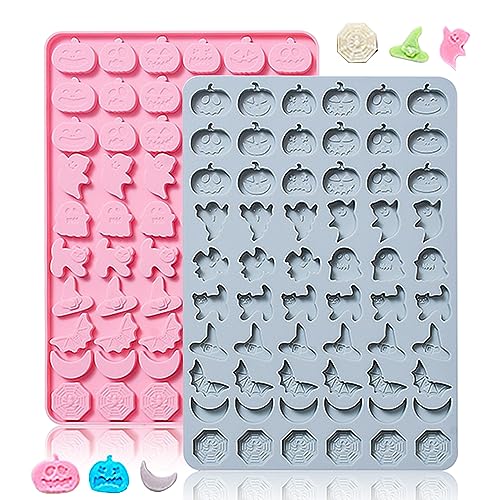
- Halloween Silicone Mold: Makes creating cute or creepy chocolate toppers a breeze.

STEP-BY-STEP: HALLOWEEN PEANUT BUTTER BLOSSOMS
- Preheat & Prep: Preheat your oven to 375°F. Line a baking sheet with parchment paper or a silicone baking mat and set aside.
- Make the Spooky Chocolates: Start by melting your milk chocolate wafers in a microwave-safe bowl, heating in 15–30 second intervals and stirring until completely smooth. Spoon the melted chocolate—or use a piping bag—into your Halloween silicone molds (affiliate), and use an offset spatula to level the tops if needed. Let the chocolates set at room temperature or pop them in the fridge until firm. These little treats will be the fun, spooky toppers for your cookies.
- Cream Together: In a stand mixer fitted with the paddle attachment, beat the softened butter, granulated sugar, brown sugar, and peanut butter together until light, creamy, and smooth.
- Egg & Vanilla: Stir in the egg, egg yolk, and vanilla extract until just combined.
- Combine Dry Ingredients and Mix: In a separate bowl, whisk together flour, corn starch, baking soda, baking powder, and salt. Gradually add to the wet mixture, stirring until just combined. Don’t overmix!
- Shape the Cookies: Scoop dough into 1 tablespoon portions and roll into balls. Roll in granulated sugar for a classic peanut butter blossom.
- Bake: Place the dough balls on the prepared baking sheet about 2 inches apart. Bake for 8-10 minutes, or until the edges are lightly golden but the centers are still soft.
- Add the Chocolate Topper: After a few minutes of cooling, gently press a spooky chocolate into the center of each warm cookie. For best results, place the cookies in the refrigerator right away to help set the chocolate and keep the faces from melting.
- Cool & Serve: Let the cookies cool on the pan for 5 minutes before transferring to a wire rack. Enjoy your soft, chewy spooky cookies—perfect for Halloween parties or family baking fun!


TIPS AND TRICKS FOR SPOOKY PEANUT BUTTER BLOSSOM COOKIES
- Even-Sized Cookies: Use a cookie scoop for uniform cookies so they bake evenly.
- Roll in Sprinkles or Sanded Sugar: For extra Halloween flair, roll your cookie dough balls in orange, black, or green sanded sugar before baking.
- Don’t Overbake: Remove cookies from the oven when the edges are set but the centers are still soft—they’ll firm up as they cool.
- Press in Chocolates While Warm: Always press in your spooky chocolate topper while the cookie is still warm, this allows it to stick perfectly.
- Easy Cleanup: Line your baking sheet with parchment paper for quick removal and less mess.
- Spooky Presentation: Serve on a Halloween-themed plate or tray for an extra festive pop.
- Freezer-Friendly: Roll dough into balls and freeze unbaked. When ready, bake straight from frozen, adding 1–2 extra minutes.
- Peanut Butter: Creamy peanut butter works best (not natural or oily kinds), since it keeps the dough smooth and prevents spreading.
- Flour Measuring: For best results, spoon and level the flour or utilize a food scale
(affiliate)
—too much flour can make the cookies dry.

Well, there you have it—a few simple tips and tricks for baking the best Halloween Peanut Butter Blossoms! This from-scratch cookie recipe is soft, chewy, festive, and guaranteed to disappear fast. Next time you’re craving a spooky, sweet treat, give these cookies a try!
Continue below for the easy-to-follow Halloween Peanut Butter Blossom cookie recipe, dig in, and enjoy every bite!
Print
Halloween Peanut Butter Blossoms
- Total Time: 30 minutes
- Yield: 36 cookies 1x
Description
These Halloween Peanut Butter Blossoms are the sweetest way to add spooky fun to a classic cookie! Made completely from-scratch, they’re soft, peanut buttery, and topped with that classic chocolate kiss—only this time with a spooky twist! Simple to make, totally unique, and guaranteed to disappear fast—making them one of the best Halloween treat ideas to bake.
Ingredients
- 3/4 cup Unsalted Butter
- 1 cup Brown Sugar
- 1/4 cup + 2 tablespoons Granulated Sugar (see notes)
- 3/4 cup Peanut Butter (creamy)
- 1 Egg
- 1 Egg Yolk
- 1 1/2 Teaspoon Vanilla Extract
- 2 1/2 cups All-Purpose Flour
- 1 Tablespoon Corn Starch (optional)
- 3/4 Teaspoon Baking Soda
- 1/2 Teaspoon Baking Powder
- 1/2 Teaspoon Salt
- 1 cup Milk Chocolate Melting Wafers
(affiliate)
Instructions
- Preheat & Prep: Preheat your oven to 375°F. Line a baking sheet with parchment paper or a silicone baking mat and set aside
- Make the Spooky Chocolates: Start by melting your milk chocolate wafers in a microwave-safe bowl, heating in 15–30 second intervals and stirring until completely smooth. Spoon the melted chocolate—or use a piping bag—into your Halloween silicone molds (affiliate), and use an offset spatula to level the tops if needed. Let the chocolates set at room temperature or pop them in the fridge until firm. These little treats will be the fun, spooky toppers for your cookies
- Cream Together: In a stand mixer fitted with the paddle attachment, beat the softened butter, granulated sugar, brown sugar, and peanut butter together until light, creamy, and smooth
- Eggs & Vanilla: Stir in the egg, egg yolk, and vanilla extract until just combined
- Combine Dry Ingredients and Mix: In a separate bowl, whisk together flour, corn starch, baking soda, baking powder, and salt. Gradually add to the wet mixture, stirring until just combined. Don’t overmix!
- Shape the Cookies: Scoop dough into 1 tablespoon portions and roll into balls. Roll in granulated sugar for a classic peanut butter blossom.
- Bake: Place the dough balls on the prepared baking sheet about 2 inches apart. Bake for 8-10 minutes, or until the edges are lightly golden but the centers are still soft
- Add the Chocolate Topper: After a few minutes of cooling, gently press a spooky chocolate into the center of each warm cookie. For best results, place the cookies in the refrigerator right away to help set the chocolate and keep the faces from melting.
- Cool & Serve: Let the cookies cool on the pan for 5 minutes before transferring to a wire rack. Enjoy your soft, chewy spooky cookies—perfect for Halloween parties or family baking fun!


Notes
- Sugar for Rolling: Set aside 2 tablespoons of granulated sugar—this will be used to roll the peanut butter dough.
- Chocolate Options: Don’t have time for DIY spooky chocolates? Use Halloween-themed chocolate shapes or chocolate pumpkins instead.
- Peanut Butter: Creamy peanut butter works best (not natural or oily kinds), since it keeps the dough smooth and prevents spreading.
- Optional Corn Starch: Cornstarch is optional, but I love adding it to my cookie recipes—it helps make them extra soft and chewy.
- Prep Time: 15 minutes
- Cook Time: 10 minutes
- Category: Dessert
- Method: Bake
- Cuisine: American
MORE FUN RECIPES TO TRY:
- Spooky Halloween Oreo Brownies
- The Best Monster Cookie Recipe
- A Pumpkin Chocolate Chip Cookie That Isn’t Weird and Cakey
- Giant Cookie Monster Cookies
DISCLOSURE: Some of the links provided on this page are affiliate links. This means if you choose to make a purchase through these links, we may receive a small commission at no extra cost to you. We only recommend products we believe will benefit our readers. Your support helps us continue providing quality content.


